Creating a new project
In the previous section we cloned an existing ASP.NET Web Forms application, eShopLegacyWebForms. In this section we will begin the migration process by creating a new project. The new project will be the migration target as we perform a side-by-side migration strategy. Because of the number of differences between .NET Framework and ASP.NET Core, the app will be migrated to a new project. In addition, there is no direct migration path for Web Forms views to ASP.NET Core and the views will need to be completely rewritten.
To create the new project we’ll utilize Telerik UI for Blazor. Telerik UI for Blazor contains productivity tools for Blazor applications and is a great fit for migration as well. The Telerik templates, scaffolding tools, and components will reduce the amount of coding needed to write new views.
The Telerik Extensions for Visual Studio are added to Visual Studio when installing Telerik UI for Blazor. If the extension isn’t installed, it can be added from the Visual Studio Marketplace, or the Telerik UI for Blazor installer. Important: Telerik UI for Blazor is required to make use of the extension.
-
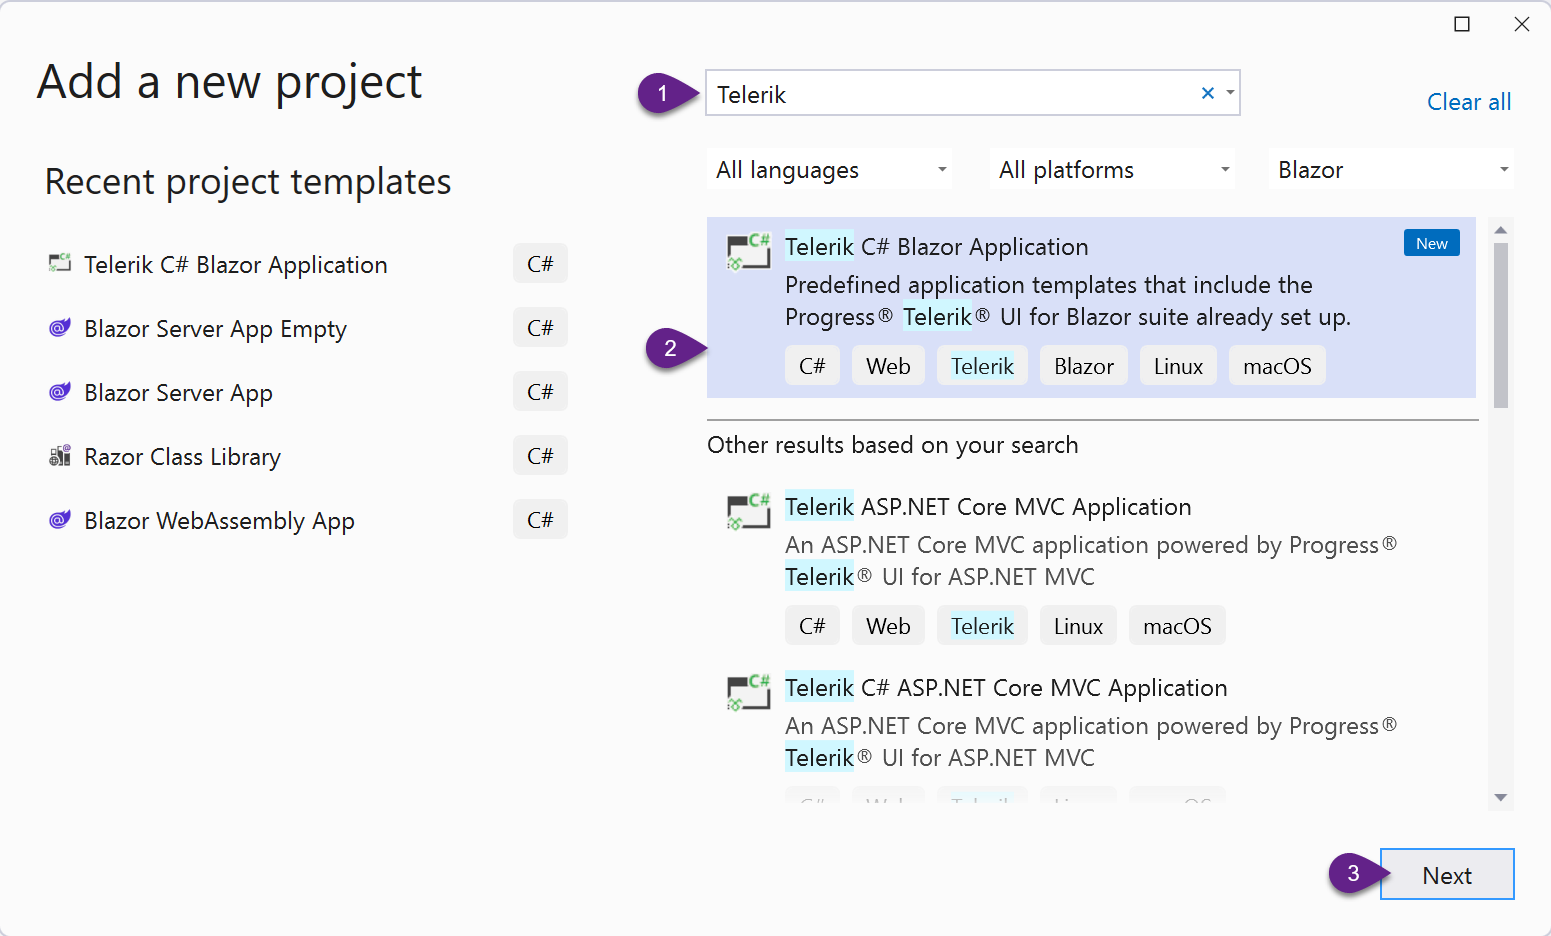
Create a new Telerik UI for Blazor Server application. This application will be the migration target. To create a Telerik UI for Blazor application in the solution:
- Right click on the root item in the solution, Solution, eShopLegacyWebForms.
- Select the Telerik C# Blazor Application template.
- Click Next
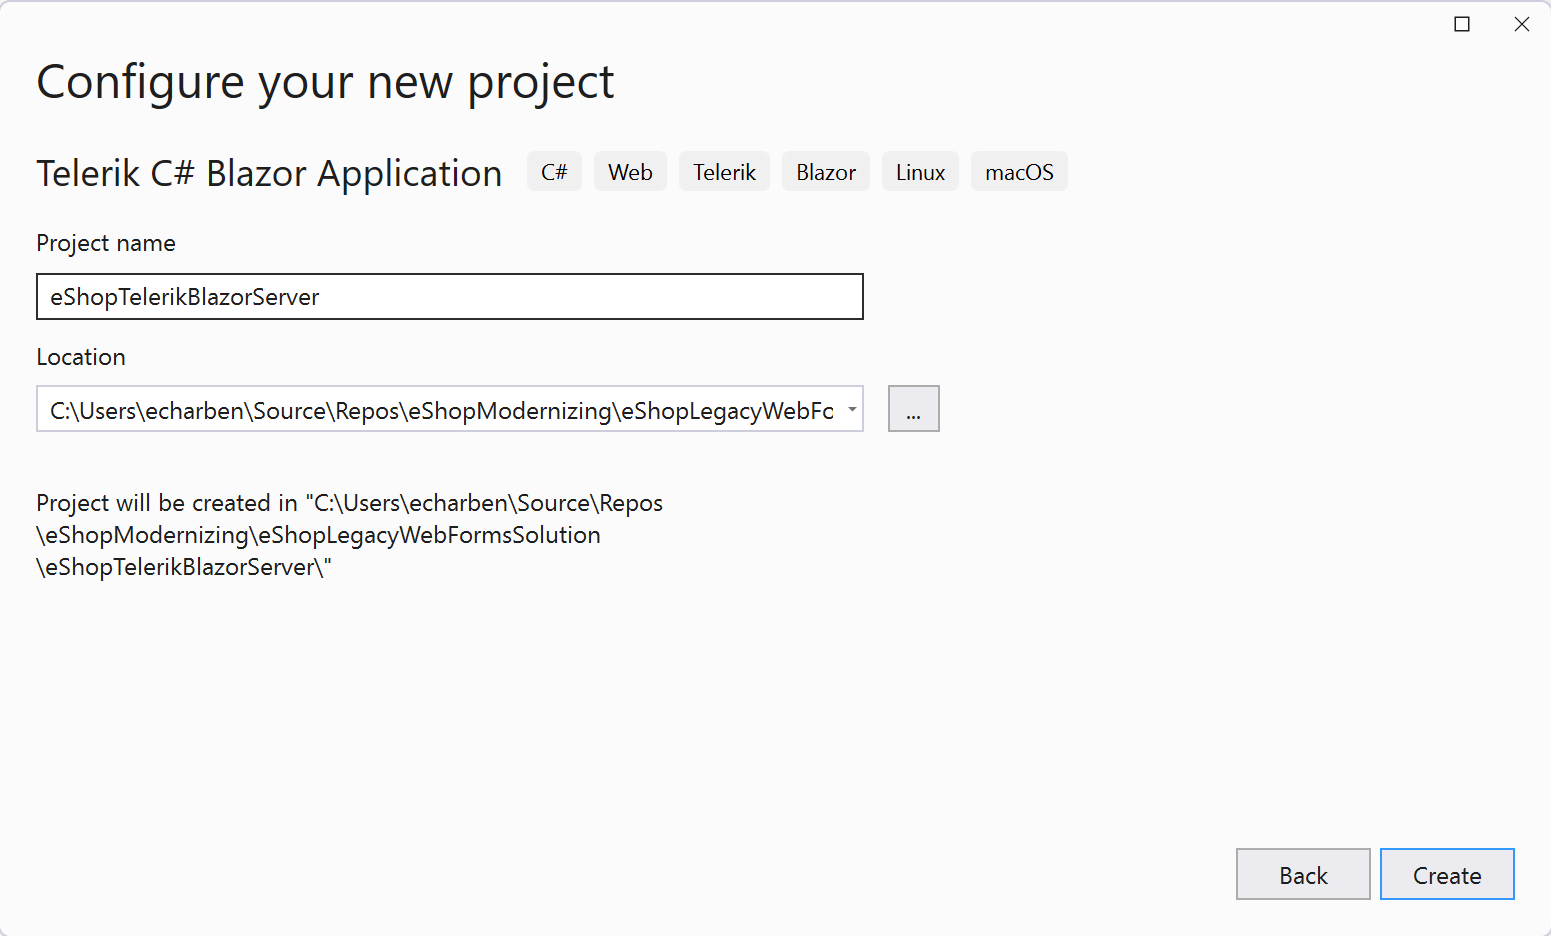
- Name the project eShopTelerikBlazorServer.
- Click Create
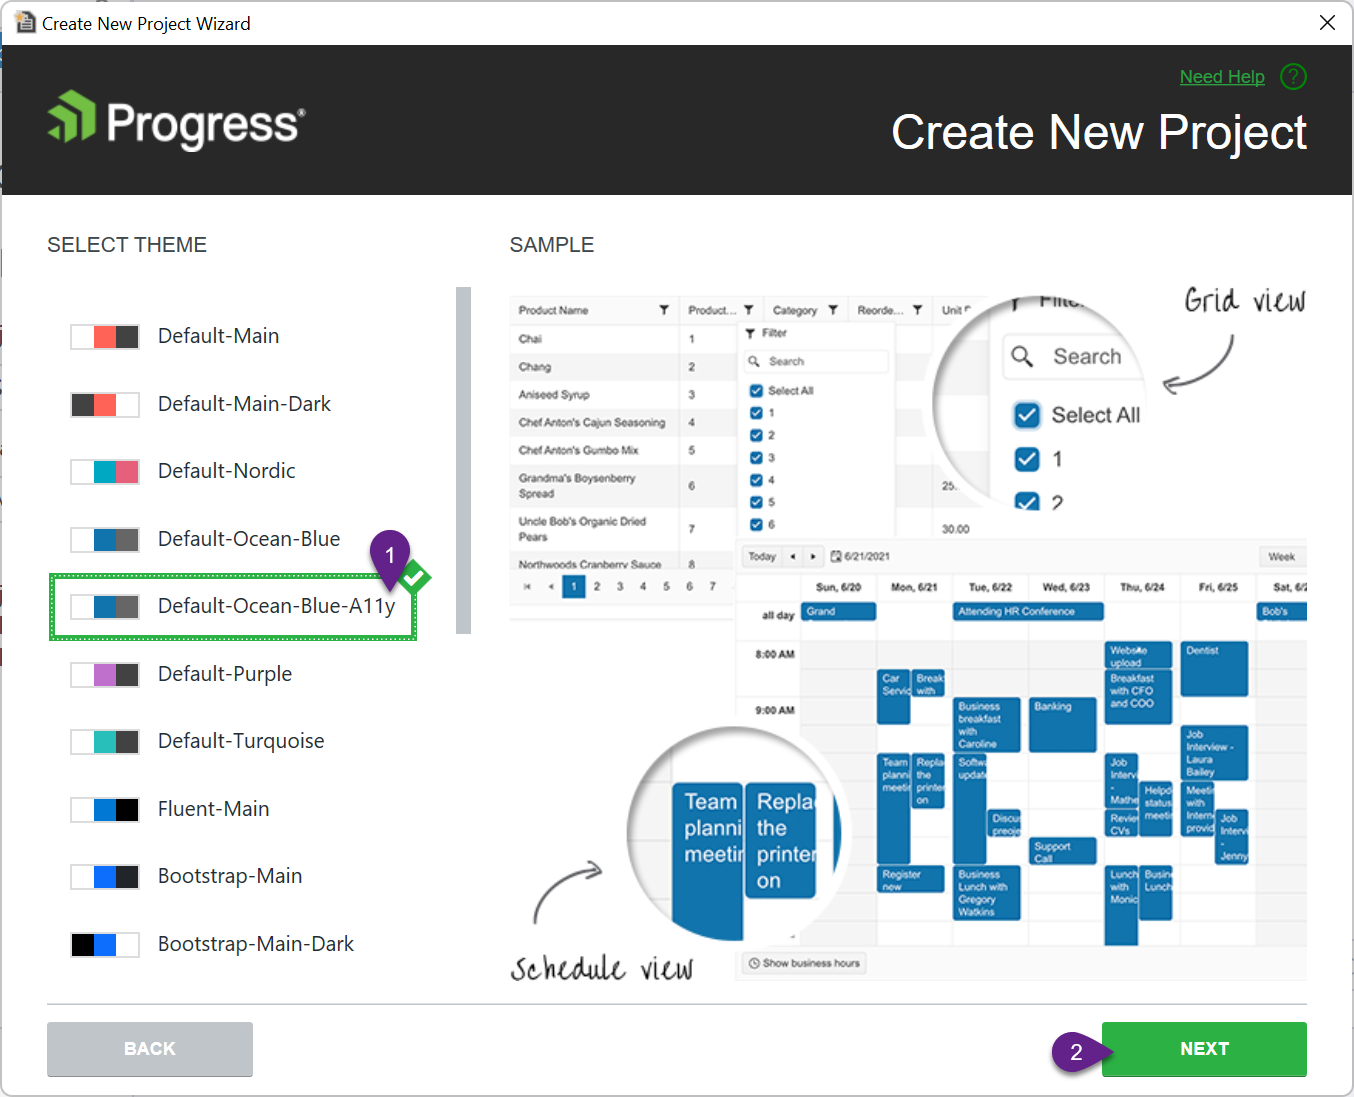
- Select the Default-Ocean-Blue-A11y theme. The Default-Ocean-Blue-A11y theme is recommended because it has been tested for color contrast ensuring optimal accessibility.
All Telerik themes are completely customizable through the Progress Theme Builder. After completing the workshop, try customizing your theme.
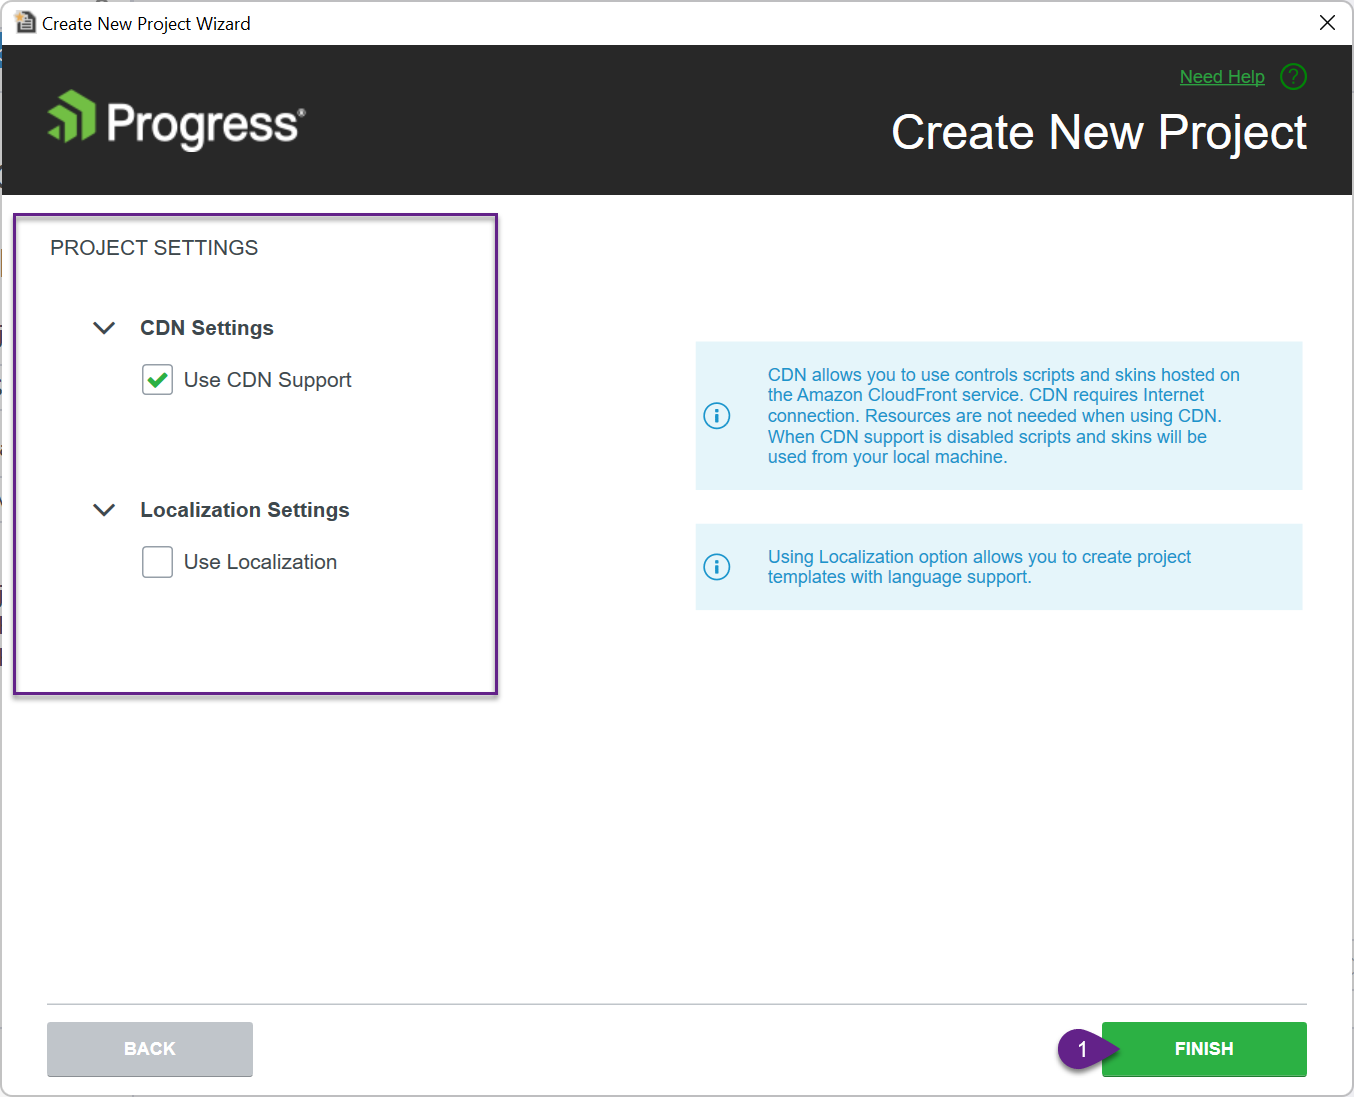
- For the workshop the default project settings will be used.
- Use CDN Support is enabled.
- Use Localization is disabled
When using Telerik UI for Blazor on projects that require localization, the option can be enabled here and localization resources will be generated. Localization is not discussed in this workshop, so the option is left disabled. Try enabling Localization in a sample application to see how it affects the template.
- Click finish to generate the new project.
-
Set the Startup project to the Blazor Server project, eShopTelerikBlazorServer. Choose Configure Startup Projects from the Project menu.
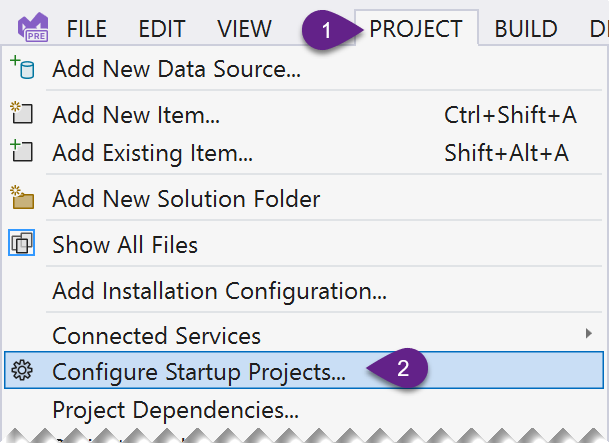
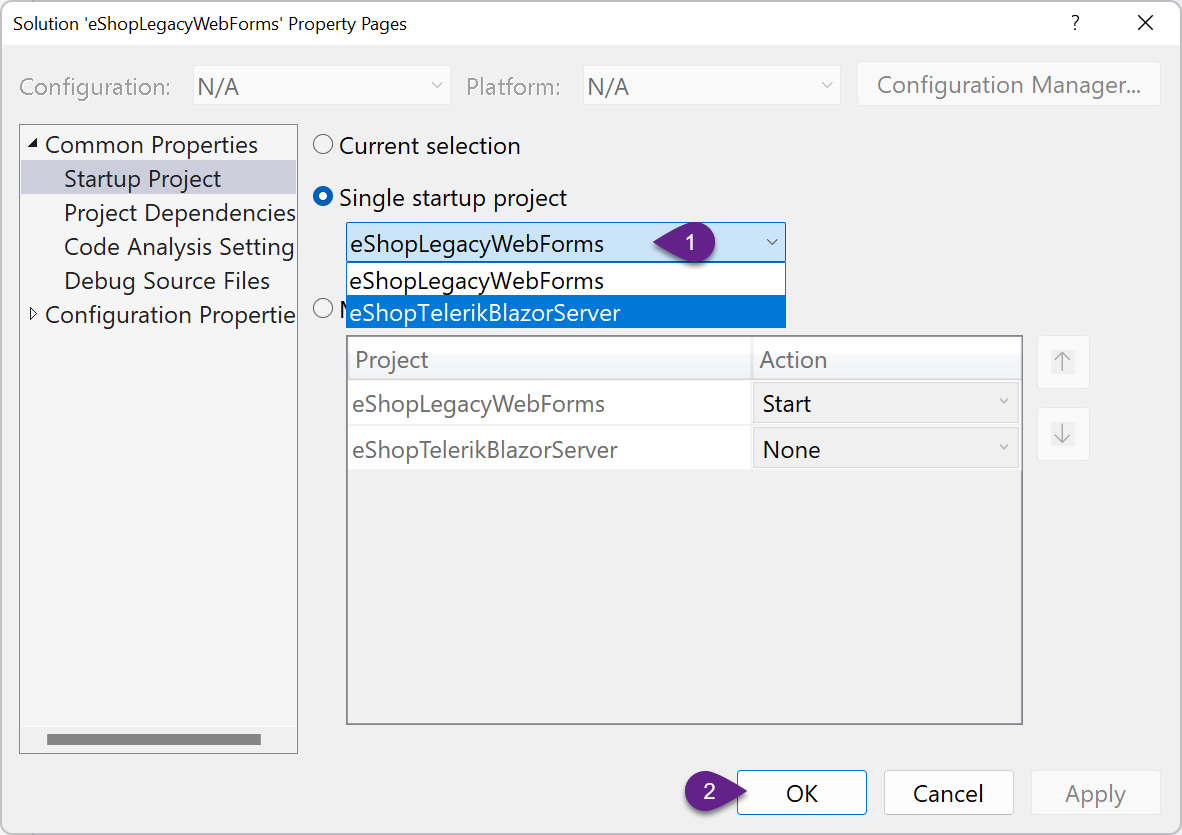
- Select the eShopTelerikBlazorServer project from the Single startup project option. This menu can be revisited at any time to switch startup projects, or enable multiple startup projects.
-
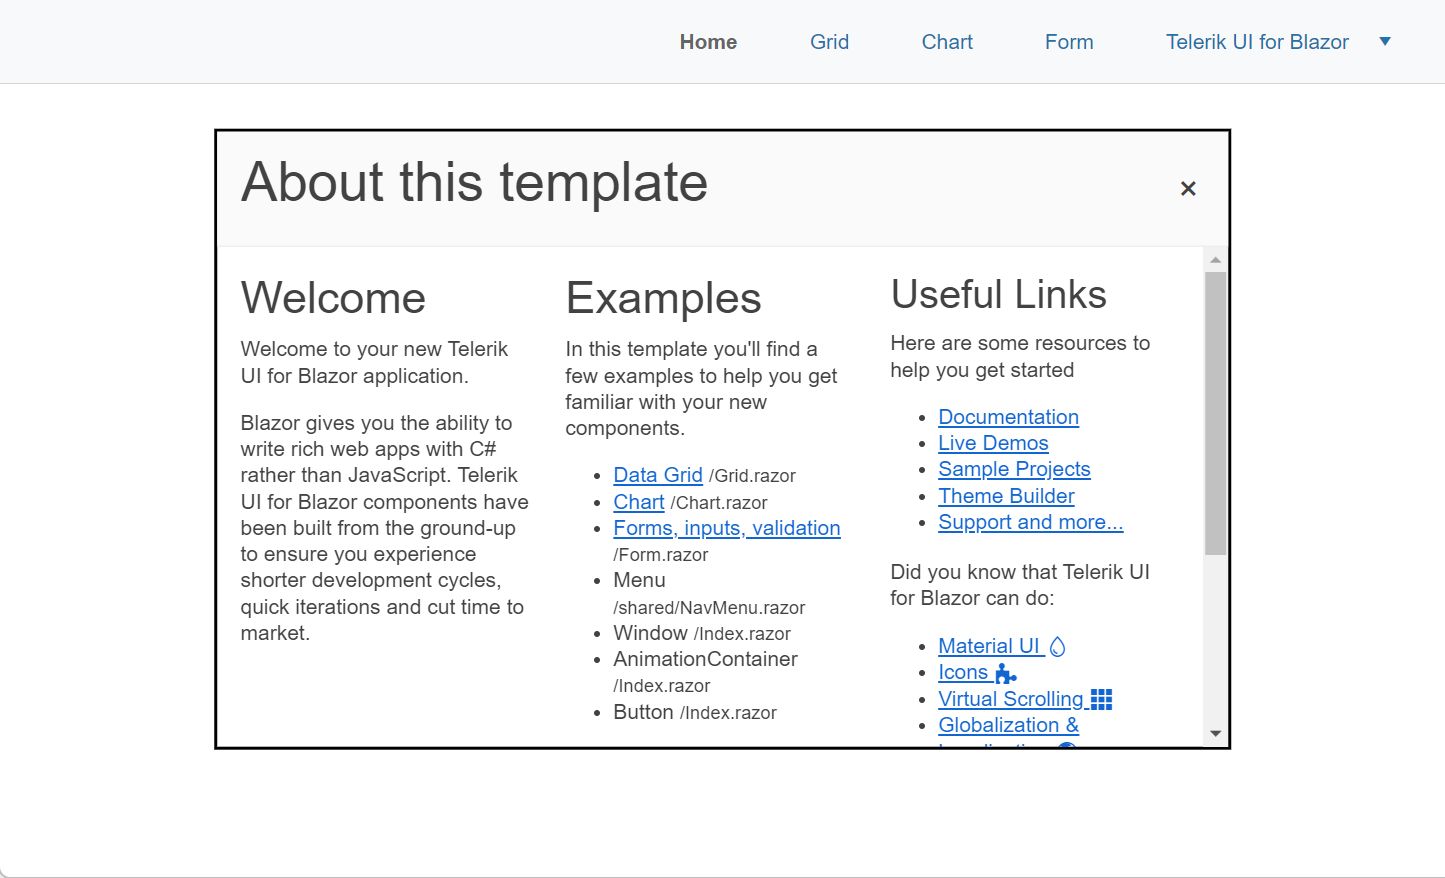
Start the eShopTelerikBlazorServer project by clicking Start or pressing F5.
-
Explore the new application to see an example of Telerik UI for Blazor’s components and capabilities.
/the root page demonstrates the window component and notification components. The code for this view is located inIndex.razor./gridthe grid page displays a sample Telerik Grid component with Create, Read, Update and Delete operations./chartthe chart page shows one of the many charts available in Telerik UI for Blazor./formthe form page uses the Telerik Form component and its automatic form generation features.
Conclusion
In this section we added a new Telerik UI for Blazor Server project to the solution. This project will eventually become the migrated solution. Through the Telerik tooling, a new project was easily created using a template that includes navigation, and sampling of components that are included in Telerik UI for Blazor.
Just a few components are shown in the template, however Telerik UI for Blazor includes over 100 components. For a complete list of components see the official Telerik UI for Blazor home page.
In the next section we will use the .NET Upgrade Assistant to begin the migration process.